
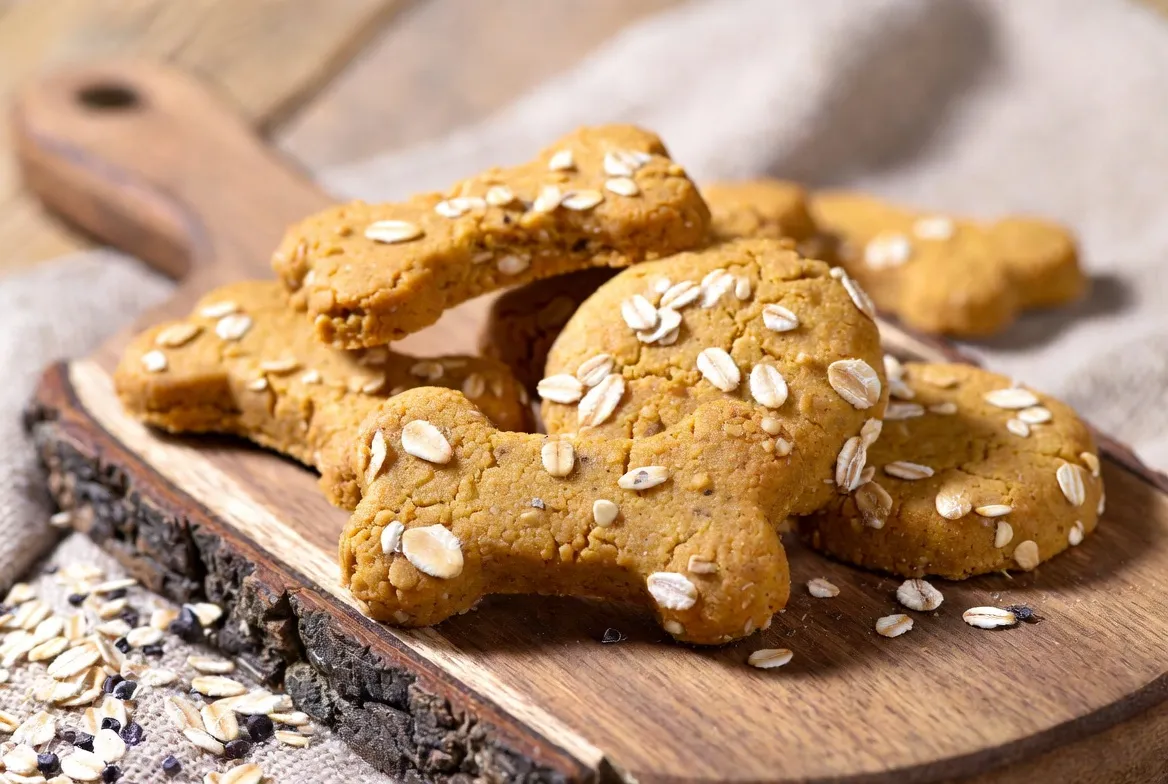
Easy Dog Treat Recipe with Rolled Oats Your Dog Will Love
There’s nothing like a wagging tail when you come home. Your dog loves you without condition. Baking for your best friend shows you care and gives them great nutrition.

Many snacks have bad stuff in them. But, using fiber-rich grains is better. It’s a great way to make healthy snacks and bond with your pet.
This easy dog treat recipe with rolled oats makes baking simple. It’s designed for you to make healthy snacks at home. You don’t need to be a pro to make treats your dog will love.
Why Oats Are a Superfood for Your Pup
Oats are more than just a breakfast food for humans. They are a nutritional powerhouse for your dog. When you make dog-friendly oat treats, you give your pet vital nutrients like linoleic acid. This omega-6 fatty acid is vital for a strong skin barrier and shiny coat.
The Digestive Benefits of Fiber
Oats are great for your dog’s diet because of their fiber. This natural fiber helps regulate blood glucose levels. It keeps your dog feeling steady all day. It also promotes smooth and healthy digestion for dogs of all ages.
Oats as a Gluten-Free Alternative
Many dogs have sensitivities to grains like wheat or corn. Oats are a great gluten-free alternative that’s easy on sensitive stomachs. Switching to these grains can reduce bloating or discomfort after snacks.
Boosting Energy Levels Naturally
Active dogs need a steady energy supply for their daily adventures. These grains give a natural energy boost that lasts. Adding dog-friendly oat treats to your routine keeps your furry friend happy, active, and full of life.
Essential Ingredients for Your Homemade Dog Treats
Start your journey to making homemade dog treats by going to the grocery store. Choosing the right ingredients is key. This ensures your dog’s treats are safe and healthy.

Selecting the Right Rolled Oats
Look for plain, unflavored rolled oats in the cereal aisle. Always check the label to avoid additives. Some oats have xylitol, which is highly toxic to dogs.
Choose simple, whole-grain oats for the best texture. These oats make your dog feel full and happy. Organic or gluten-free oats are great for most dogs.
Choosing Dog-Safe Binding Agents
You need a good binding agent for your homemade dog treats. Use natural ingredients instead of processed ones. These add moisture and flavor, making the dough easy to work with.
Here are some safe options for binding:
- Unsweetened applesauce: Adds sweetness and moisture without sugar.
- Mashed bananas: A great binder that also boosts potassium.
- Pureed pumpkin: Good for digestion and keeps the dough firm.
- Whisked eggs: Adds protein and helps the treats keep their shape.
Adding Flavor Enhancers Your Dog Will Adore
With your base and binder ready, you can add flavor. Use natural ingredients that are safe for dogs. This makes your homemade dog treats more fun for your pet.
Here are some tasty additions:
- Finely chopped fresh parsley for fresher breath.
- A small amount of unsalted peanut butter for a rich, nutty taste.
- Grated carrots or zucchini for a healthy crunch and added vitamins.
- A dash of cinnamon, which is safe for dogs and adds a warm, inviting aroma.
Always remember to introduce new ingredients slowly. This ensures your dog can handle them. With these simple, wholesome items, you’re ready to bake treats your dog will love.
Preparing Your Kitchen and Equipment
Starting to make treats for your dog is more than just baking. It’s about being efficient and safe for you and your pet. Organizing your kitchen is the first step to making great simple rolled oats dog snacks.
Gathering Your Baking Essentials
First, gather all the tools you need. You’ll need a big mixing bowl, a strong spatula, a rolling pin, and cookie cutters. Having these ready lets you focus on the ingredients.
Sanitizing Your Workspace
Cleanliness is key when making food for your pet. Make sure your countertops are clean with a safe cleaner. A clean workspace means you can make healthy snacks without worry.
Measuring Ingredients for Consistent Results
Getting the right texture and nutrition is important. Use measuring cups and spoons for exact amounts. Accurate measurement ensures your treats are always up to your dog’s standards.
The Ultimate Easy Dog Treat Recipe with Rolled Oats
Getting the right mix for your dog biscuits is key. A good Easy Dog Treat Recipe with Rolled Oats makes sure they are crunchy and tasty for your pet.

Understanding the Ingredient Ratios
The secret to great baking is finding the right mix of dry and wet ingredients. If the mix is wrong, your dough might be too crumbly or too wet.
To make a consistent Easy Dog Treat Recipe with Rolled Oats, remember these tips:
- Dry components: Oats are the main structure.
- Binding agents: Eggs or pureed fruits keep the oats together.
- Moisture balance: Add liquids slowly to get the right texture.
Preparing Your Wet and Dry Mixtures
Being efficient in the kitchen starts with preparing well. Mix your dry ingredients in one bowl and your wet ingredients in another before combining.
This way, you avoid over-mixing, which can make the biscuits tough. Whisk your wet ingredients well to spread the binding agents evenly. This makes your dough smooth and cohesive.
Combining Ingredients for the Perfect Dough Consistency
When your mixtures are ready, it’s time to mix them. Slowly add the wet mixture to the dry oats with a strong spatula. Keep mixing until a thick dough forms.
If the dough seems too dry, add a little water at a time. Getting this right is crucial for an Easy Dog Treat Recipe with Rolled Oats that your dog will love every time.
Step-by-Step Mixing and Dough Preparation
Making a great snack for your pet starts with the right dough texture. You need the perfect mix for a quick oat-based dog treat recipe that stays together when baked. A balanced mix means every bite is tasty and sturdy for your pet.

Techniques for Achieving the Right Texture
Focus on the mix of wet and dry ingredients for the best results. If it’s too dry, add a bit of water or broth. Too wet? Add more oats to fix it.
Consistency is key for no-bake rolled oats dog cookies or baked treats. Aim for a dough that’s easy to work with but not too sticky. Here’s how to get it right:
- Slowly add wet ingredients to the dry base.
- Use a strong spatula to mix well.
- Press the dough with your fingers to check.
- Adjust the moisture a little at a time.
Handling Sticky Dough Without the Mess
Sticky dough can be tricky, but you can avoid messes. Parchment paper is your best friend for this.
Put your dough between parchment paper before rolling it out. This simple barrier stops it from sticking. It also makes cleanup easy and helps you move the dough without it changing shape.
Resting the Dough for Better Results
Being patient is key when making no-bake rolled oats dog cookies or other snacks. Always let the dough rest for at least fifteen minutes before shaping. This lets the oats soak up moisture, making the dough easier to work with.
This resting time is crucial for a quick oat-based dog treat recipe. It helps the ingredients stick together well. After fifteen minutes, your dough will be much easier to handle and ready for the next step.
Shaping and Baking Your Oat Biscuits to Perfection
Now your dough is ready. It’s time to make it into treats. Shaping your diy oat dog biscuits is fun. You can use different cookie cutters to make them look great.
You can pick shapes that match the season. Or use classic bone shapes to make your dog happy.
Rolling and Cutting Your Treats
First, dust your countertop with flour. This stops the dough from sticking. Roll the dough to about a quarter-inch thick.
Carefully press your favorite cutters into the dough. Put them close together to use all the dough.
Optimizing Oven Temperature for Even Baking
Preheating your oven is very important. Set it to 350°F as your recipe says. This makes sure the biscuits bake evenly.
Don’t put too many biscuits on one sheet. This stops them from getting soggy. Give each biscuit room to bake well.
Determining When Your Treats Are Fully Done
Check if your biscuits are done by looking at the edges. They should be light golden-brown. They should also feel firm, not soft.
If you want them crunchier, bake them a bit longer after turning off the oven. Always cool them on a wire rack before giving them to your dog. This makes them crispy and perfect.
Remember, cooling them completely is key. It makes them crunchy and tasty for your dog. Patience is what makes them the best.
Creative Variations to Customize Your Dog Treats
Once you learn the basic recipe, you can turn your kitchen into a bakery for your pet. You can make these oat dog treats for pups your own by changing ingredients. This makes it easy to use what you have at home.
Adding Peanut Butter for Extra Protein
Peanut butter is a hit with dogs and is full of healthy fats and protein. Make sure to pick a brand that doesn’t have xylitol. This sweetener is bad for pets. Adding a bit of peanut butter gives your treats a yummy, nutty taste.
Incorporating Pumpkin for Digestive Health
Pumpkin is great for your dog’s stomach. It’s full of fiber, which helps with digestion. Adding it to your treats makes them even better for your pet.
Using Fresh Fruits and Vegetables
Adding fresh fruits and veggies can make your treats even healthier. Here are some good choices:
- Blueberries: They’re full of antioxidants that help keep your dog healthy.
- Carrots: Grated carrots add crunch and beta-carotene.
- Apples: Make sure to remove seeds and core before using.
- Spinach: A little chopped spinach adds important vitamins.
Trying out these healthy ingredients makes your oat dog treats for pups tasty and nutritious. Always add new foods slowly to check if they’re okay for your dog.
Proper Storage and Shelf Life for Homemade Snacks
Proper storage keeps your pup happy with every homemade dog treat. A few extra steps after baking make snacks safe and tasty for your furry friend.
Cooling Your Treats Before Storage
Let your snacks cool completely before storage. Warm biscuits in a container trap steam, causing unwanted moisture buildup.
This extra moisture leads to mold. Always use a wire cooling rack. It lets air circulate, making treats crisp and dry before storage.
Choosing the Right Containers
Choose the right container once your treats are cool. Use airtight containers to keep treats crunchy.
Glass jars or BPA-free plastic containers are best. In humid climates, add a food-grade silica packet for better texture.
Freezing Treats for Long-Term Freshness
Freezing is smart for large batches. Place cooled snacks in a freezer-safe bag or container. Squeeze out air well.
When ready, thaw a few homemade dog treats at room temperature. This keeps snacks fresh and healthy in the freezer.
Safety Guidelines and Ingredients to Avoid
When making healthy dog treats with oats, safety is key. Baking for your pet shows love, but some kitchen items are harmful. Always double-check your labels before mixing.
Identifying Toxic Ingredients for Dogs
Some human foods are toxic to dogs and should not be used. Even a little can harm your pet.
Keep these ingredients away from your dog’s snacks:
- Chocolate and Cocoa: Contains theobromine, which is dangerous for dogs.
- Grapes and Raisins: These can lead to sudden kidney failure.
- Onions, Garlic, and Chives: These can damage your dog’s red blood cells.
- Xylitol: This common artificial sweetener is extremely toxic and found in many sugar-free products.
- Macadamia Nuts: These can cause weakness, tremors, and overheating.
Managing Portion Sizes and Caloric Intake
Even healthy treats should be given in moderation. Treats should not be more than ten percent of your dog’s daily calories.
Too many treats can lead to weight gain. This can stress your dog’s joints and heart. Always adjust your dog’s main meal portions if they have had extra snacks.
Consulting Your Veterinarian About Dietary Needs
Every dog has different nutritional needs. This depends on their age, breed, and how active they are. Before adding new foods, talk to your vet.
Your vet can tell you if healthy dog treats with oats are good for your pet. Professional advice keeps your dog happy and healthy for a long time.
Understanding the Nutritional Benefits of Oat-Based Snacks
Oats are a nutritional powerhouse for your dog’s daily wellness. By baking with these grains, you create dog-friendly oat treats that your pet will love.
Vitamins and Minerals Found in Oats
Oats are full of essential nutrients for your dog’s health. They have lots of iron, zinc, and manganese. These minerals help keep your dog’s energy up and metabolism working well.
These minerals make sure your dog stays active and fun all day. Consistent nutrition is key to a happy pet.
Supporting Skin and Coat Health
Oats also benefit your dog’s skin and coat. They have antioxidants that fight inflammation and soothe sensitive skin.
Regularly eating these nutrients makes your dog’s coat shine and skin healthier. Making dog-friendly oat treats at home boosts your pet’s natural beauty and comfort.
Why Homemade Beats Store-Bought Alternatives
Baking your own snacks lets you control every ingredient. Many store-bought snacks have artificial fillers and preservatives that are bad for your pet.
By making your own dog-friendly oat treats, you avoid harmful chemicals. Homemade snacks give you peace of mind, knowing you’re feeding your pet the best.
Conclusion
Making snacks at home is a great way to show your dog love. It also makes sure they get the best nutrition. Now, you know how to bake yummy oat dog treats that are safe and healthy for them.
These homemade treats let you know exactly what’s in them. You pick every ingredient. This gives you peace of mind, which is very important for pet owners.
Try new things with your dog’s snacks. Add fresh blueberries or a little organic peanut butter. Your dog will love the effort you put into making these treats.
Share your baking with other pet owners. Post pictures of your treats and tell us your dog’s favorites. Your feedback helps us make better resources for dog lovers everywhere.


