
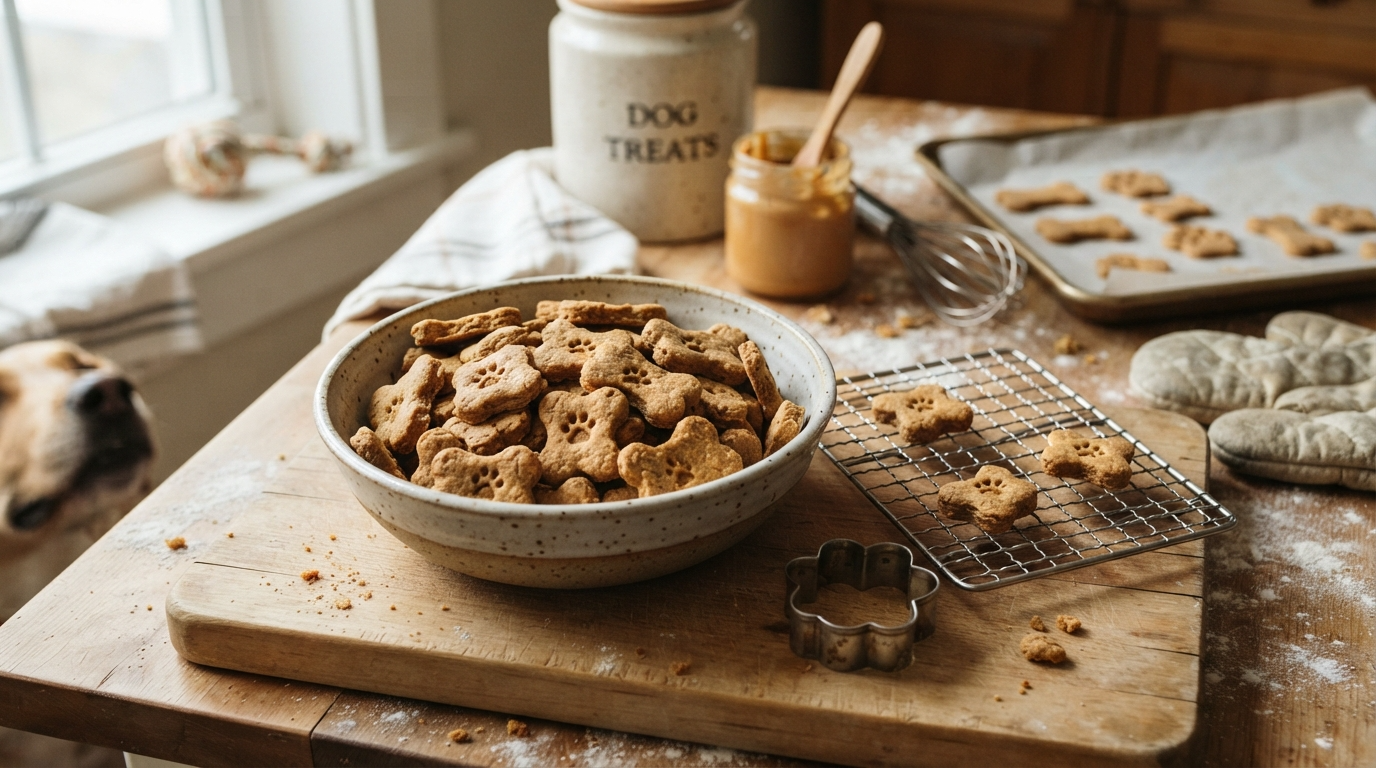
Homemade Dog Treats You Can Make in 30 Minutes Today
There’s nothing like a wagging tail from a loyal friend waiting for a treat. Seeing that pure joy shows us why we love our pets so much. But when we’re busy, spending time with them can be hard.
But making healthy snacks doesn’t take all day. We’ve put together a list of homemade dog treats you can make in 30 minutes. These recipes use common ingredients and simple steps, perfect for a busy day.

Our guide has everything from crunchy biscuits to soft treats and tasty training snacks. We also have cool, frozen snacks for hot days. You’ll learn how to make, portion, cool, and store these 30-minute dog treats safely. You can make each treat special for your pet, using only the best ingredients.
Get Your Kitchen Ready for Quick Dog Treats
Setting up your kitchen well is key to making snacks fast. Organize your space first. This makes making quick dog treats fun and easy for you and your dog.
Choose dog-safe ingredients and simple equipment
You don’t need fancy tools to make tasty treats. Basic items like a bowl, spoon, and baking sheet are enough. Keep oats, peanut butter, and pumpkin on hand for quick baking.
Measure portions so each recipe stays within the 30-minute goal
Being efficient is crucial for 30-minute dog treats. Measure ingredients before baking. This keeps your baking on track and within time.
Check your dog’s allergies, dietary restrictions, and calorie needs
Think about your dog’s health before baking. Every dog is different, with unique needs. Always talk to your vet about new foods to keep your dog safe.
Ingredients to avoid include chocolate, grapes, raisins, onions, garlic, and xylitol
Keeping your dog safe is the top priority. Avoid toxic ingredients in your treats. Never use:
- Chocolate and cocoa products
- Grapes and raisins
- Onions and garlic
- Xylitol (a common artificial sweetener)
By avoiding these, you can make quick dog treats safely. This way, your 30-minute dog treats are always a delightful and safe reward.
Homemade Dog Treats You Can Make in 30 Minutes: Basic Tips
Making snacks for your pet is easy and quick. Learn a few basic steps to make quick dog treats that are healthy. These tips help you work fast and keep your treats safe for your dog.
Use plain, unsweetened, and unseasoned ingredients
Good recipes start with quality ingredients. Always choose plain, unsweetened, and unseasoned items. This avoids harmful additives like xylitol or too much salt. Your dog’s health is the top priority, so keep it simple and natural.
Adjust dough texture with water, oats, or whole-wheat flour
Don’t worry if your dough is too sticky or dry. You can fix it easily. Add water to dry mixes or use oat flour or whole-wheat flour to make it firmer.
Choose small treat sizes for training and portion control
When making diy pet treats, remember size is key. Small treats are great for training because they don’t overfeed. Use a small cookie cutter or roll dough into tiny balls for better control.
Let baked treats cool completely before serving
Be patient after baking. Let your treats cool completely on a wire rack before giving them to your pet. This makes them the right texture and avoids mouth burns from hidden heat.
- Check labels for hidden sugars or artificial sweeteners.
- Keep a bag of oat flour handy for quick texture fixes.
- Use a pizza cutter to create uniform, bite-sized squares.
- Store cooled treats in an airtight container to maintain freshness.
Peanut Butter Banana Oat Bites
These peanut butter banana oat bites are quick to make. They’re homemade dog treats you can make in 30 minutes. They’re great for busy pet owners who want a healthy treat.
Ingredients for soft, naturally sweet bites
This recipe is simple and uses healthy ingredients. You need just a few things to make a treat your dog will love.
Use xylitol-free peanut butter and ripe banana
Make sure your peanut butter doesn’t have xylitol. Xylitol is bad for dogs. Use a ripe banana for sweetness and to help the oats stick together.
How to mix, shape, and bake the bites
Mash the banana in a bowl until smooth. Mix in the peanut butter and oats until it’s a dough. Here’s how to finish:
- Preheat your oven to 350°F (175°C).
- Scoop small portions of dough and roll them into balls.
- Place the balls on a parchment-lined baking sheet.
- Flatten each ball slightly with a fork to create a classic cookie shape.
- Bake for 12 to 15 minutes until the edges are lightly golden.
Texture adjustments for puppies and senior dogs
For puppies or senior dogs, make the bites softer. Add a little water or unsweetened applesauce to the dough. This makes the treats gentle on their teeth and gums.
Serving size, storage, and freezing instructions
Let the bites cool on a wire rack before serving. Since they’re homemade pet snacks, store them in an airtight container in the fridge for a week.
To keep them longer, freeze them in a bag. They’ll last up to three months in the freezer. Just thaw a few when you need to reward your dog.
Pumpkin Oat Treats for an Easy Homemade Snack
Making dog treats at home is easy. You can make these snacks in under half an hour. You’ll need ingredients you probably have at home.
Ingredients for fiber-rich pumpkin treats
These treats are made with simple, healthy ingredients. Pumpkin adds fiber, and oats give a tasty texture.
- 1 cup of pureed pumpkin
- 2 cups of rolled oats
- 1 large egg to bind the mixture
- A dash of cinnamon (optional)

How to form bite-size cookies without complicated tools
You don’t need special cookie cutters. Just roll the dough into small balls and flatten them a bit.
For uniform treats, roll the dough flat. Then, use a butter knife to cut it into squares. This makes easy, consistent treats for training.
How canned pumpkin differs from pumpkin pie filling
Make sure to pick the right pumpkin. Always use 100% pure canned pumpkin, not pie filling.
Pie filling has added sugars and spices. These can be harmful to your dog. They can cause stomach problems or even be toxic.
Ways to make the treats crisp or soft
You can change the treat’s texture easily. For a chewier treat, bake them for less time at a lower temperature.
For a crunchier treat, bake them longer. You can also let them cool in the oven to dry them out more.
Safe portions and refrigerator storage
Keep these treats cool to keep them fresh. Store them in an airtight container in the fridge for up to a week.
If you have a lot, freeze them for up to three months. Remember, these treats are a snack, not a meal replacement.
Sweet Potato Dog Biscuits
Making healthy biscuits for your dog is simple. Sweet potatoes are a great base because they’re full of nutrients and fiber. They’re also sweet, which dogs love.
Ingredients for simple, wholesome biscuits
You need just a few things to start. Get one medium cooked sweet potato, two cups of whole-wheat flour, and one large egg. The egg helps hold the mix together.
These simple pet recipes use only the best ingredients. If the dough seems too dry, add a little water.
Prepare and mash the sweet potato quickly
Peel and cube your sweet potato first. Boil it for ten minutes until it’s soft. Then, drain and mash it well.
Let the mash cool a bit before mixing it with the other ingredients. Cooling helps the egg not scramble when you mix the dough.
Roll, cut, and bake the dough
Flour your countertop lightly and roll the dough to a quarter-inch thickness. Use fun shapes to make the biscuits special.
Put the shapes on a baking sheet lined with parchment paper. Bake at 350°F for 20 to 25 minutes. They should be firm and golden.
Make smaller biscuits for training rewards
For training, cut the dough into small squares. These tiny treats are perfect for rewarding your dog often without overfeeding.
These small biscuits bake faster. Watch them closely. Consistency in size helps them bake evenly.
Keep the biscuits fresh and prevent spoilage
Since these treats have no preservatives, storing them right is key. Cool them completely on a wire rack before storing in an airtight container.
Keep them in the fridge for up to a week. If they smell bad or are moist, throw them away. This keeps your pet safe and healthy.
Apple Carrot Crunch Cookies
You can make these crunchy, fruit-filled snacks in under half an hour. These diy pet treats use fresh produce’s sweetness, not artificial additives. They’re a healthy choice for your dog.
Ingredients that add natural flavor and texture
To make these cookies, you need fresh apples, crisp carrots, oat flour, and a bit of egg. These give a great natural crunch dogs love.
Remove apple seeds, stems, and cores before grating
First, prepare your fruit right. Take out apple seeds, stems, and cores before grating. Safety is the top priority when making any homemade snack.

Combine the batter and create evenly sized cookies
Mix grated ingredients with flour and egg until it’s a firm dough. Use a small scoop or spoon for even-sized cookies. This ensures they bake evenly.
Use grated carrot and apple without adding sugar
You don’t need sugar for these diy pet treats. Apples and carrots give enough flavor. Grating them finely makes the dough consistent.
How to achieve a crunchy finish
For a crisper cookie, bake a bit longer at a lower temperature. This removes extra moisture. Dogs love the satisfying snap during training.
Portion guidance for small, medium, and large dogs
Think about your dog’s size when giving these snacks. Small dogs get one small piece. Medium and large dogs can have two or three, depending on their calorie needs. Moderation is key for your pet’s health.
Chicken and Rice Training Bites
Training your dog gets easier with tasty, protein-rich treats. These homemade pet snacks are great for training. They’re small, healthy, and dogs love them.
Ingredients for savory, protein-rich treats
You need just a few simple ingredients for these bites. They mix lean protein with carbs. This makes them perfect for training every day.
Use fully cooked, boneless, skinless chicken without seasoning
Make sure the chicken is fully cooked and without bones or skin. It must also be free from salt, garlic, onion, and other harmful seasonings.
Mix the chicken and rice into a workable dough
Put cooked chicken and plain rice together. Use a food processor to mix until it’s a thick dough. This dough should hold its shape well.
Shape tiny bites for positive-reinforcement training
For training, use treats that dogs can swallow fast. Roll the dough into tiny, pea-sized bites. This way, you can reward your dog many times in one session.
Make the recipe suitable for sensitive stomachs
If your dog’s stomach is sensitive, this recipe is gentle. You can adjust the rice to chicken ratio. This makes the treats safe for their stomach.
Refrigerate or freeze leftovers safely
Since these treats have fresh meat, store them in the fridge for up to three days. For longer storage, freeze them in an airtight container. This keeps them fresh for weeks.
Frozen Yogurt and Blueberry Drops
Try these refreshing frozen yogurt and blueberry drops for your pup. They are perfect for hot summer days or as a simple reward. You don’t need to bake them.
Ingredients for a fast no-bake treat
Select plain yogurt without added sugar or xylitol
High-quality, plain yogurt is the base of this recipe. Always check the label for no added sugar or artificial sweeteners. Xylitol is very bad for dogs.
Use simple, natural ingredients to keep your pet safe. Plain Greek yogurt gives a thick, creamy texture that freezes well.

Blend, spoon, and freeze the treat drops
Making these fast dog treat recipes is easy. Blend yogurt with fresh blueberries until smooth. Or, leave the berries whole for a chunky texture.
Drop dollops of the mixture onto a parchment-lined tray. Freeze until firm and ready to serve.
Use blueberries in moderation and cut large berries for small dogs
Blueberries are full of antioxidants but should be given in small amounts. Cut large berries into small pieces for small dogs to avoid choking.
Prevent messy serving with a dedicated freezer container
Once frozen, put the treats in a dedicated freezer-safe container. This keeps your freezer organized and prevents odors.
Using a sealed container makes it much easier to grab treats. It helps with portion control and keeps snacks fresh for weeks.
When frozen treats may not suit puppies or dogs with dental issues
These snacks are firm when frozen. They might not be good for young puppies or senior dogs with dental pain.
If your dog has sensitive teeth, let the treat sit at room temperature for a few minutes. This makes it safer and more enjoyable for your pet to chew.
Salmon and Oat No-Bake Treats
You can make these healthy salmon and oat bites in just a few minutes. No oven needed. These simple pet recipes are great for busy owners who want good snacks for their pets.
Ingredients for an easy fish-flavored snack
You only need a few things from your pantry. They are full of protein and fiber. This makes them a delightful treat for any dog.
- 1 cup cooked salmon, flaked
- 1/2 cup rolled oats
- 1 tablespoon water or low-sodium broth
- Optional: A pinch of dried parsley for freshness
Choose plain cooked salmon or salmon packed in water
Make sure to pick plain, cooked salmon or canned salmon in water. Stay away from fish with garlic, onions, or too much salt. These are harmful to dogs.
Combine the ingredients and chill the mixture
Mix the salmon and oats in a bowl until sticky. If it’s too dry, add a little water or broth. Put it in the fridge for 15 minutes to soften the oats and mix the flavors.
Roll the mixture into small portions
After chilling, make small balls from the dough. You can make them any size based on your dog’s needs. Consistency is important so your dog enjoys every bite.
Limit rich treats and account for your dog’s regular diet
Salmon is rich in healthy fats, so give these treats in small amounts. Make sure they don’t add too many calories to your dog’s diet. These fast dog treat recipes should be a part of a balanced diet, not all of it.
Store these fast dog treat recipes safely in the refrigerator
Keep these treats cold because they have fresh fish. Store them in a sealed container in the fridge for up to three days. If you make a lot, freeze them to keep them fresh and tasty for your dog.
How to Bake, Cool, and Store 30-Minute Dog Treats
Handling your homemade dog treats you can make in 30 minutes right is key. It keeps them fresh and safe for your dog. Just follow a few easy steps after the timer goes off.

Use parchment paper and consistent cookie sizes
Always use parchment paper on your baking sheet. It stops sticking and spreads heat evenly. Making your treats the same size is crucial. If they’re not, some might burn before others are done.
Recognize when homemade treats are fully baked
Your 30-minute dog treats are done when edges are light golden brown. They should feel firm, not soft. For crunchier treats, cool them in the oven for ten more minutes.
Cool treats on a rack before transferring them
Don’t put warm treats in a container. Steam will make them soggy. Cool them on a wire rack instead. Patience is key for a crisp finish.
Label containers with the recipe and preparation date
It’s easy to forget when you made treats. Always label your containers. Write the recipe name and date to keep track of freshness. This helps manage your homemade dog treats you can make in 30 minutes well.
Counter, refrigerator, and freezer storage guidelines
Choose the right storage based on how fast your dog eats them. Here’s a guide for your 30-minute dog treats:
- Counter: Best for dry, crunchy biscuits; keep in an airtight container for up to 5 days.
- Refrigerator: Ideal for soft or meat-based treats; store for up to 2 weeks.
- Freezer: Perfect for long-term storage; keep in a sealed bag for up to 3 months.
Discard treats that develop moisture, mold, or an unusual smell
Always check your stored snacks before giving them to your pet. If they’re moist, moldy, or smell bad, throw them away. Your dog’s health is the top priority. It’s better to be safe than sorry with food quality.
Customize Easy Dog Treats Safely
Learning to change recipes keeps your easy dog treats safe and fun for your pet. By tweaking basic recipes, you can offer variety while keeping your pet healthy and happy.
Swap ingredients without adding unsafe seasonings
When making diy pet treats, use only dog-safe foods and proteins. Avoid adding onion powder, garlic, or too much salt. These can harm dogs.
Instead, use natural flavors like cinnamon, unsweetened applesauce, or fresh herbs. These make snacks tasty without harming your dog.
Adapt textures for puppies, adult dogs, and seniors
Texture matters for your dog’s enjoyment. Puppies and seniors like softer, chewier treats. These are easier on their teeth.
For softer treats, add more moisture like water or broth. Adult dogs with strong jaws prefer crunchier treats. These can also help their teeth.
Make recipes gluten-free with suitable flour alternatives
If your dog has a sensitive stomach, avoid wheat flour. Use gluten-free flours like oat, coconut, or chickpea flour for easy dog treats.
These flours soak up liquid differently. You might need to adjust the liquid in your recipe for the right dough.
Use treats as rewards without exceeding daily calories
Remember, snacks should be a small part of your dog’s diet. Use diy pet treats in small pieces for training. This keeps calories low.
Watch your dog’s weight and adjust meals if you’ve given many treats. Keeping a balance helps your pet stay healthy.
Introduce new homemade pet snacks gradually
Start with a small amount of new treats to see how your dog reacts. This gradual introduction helps spot any issues early.
Watch your dog for 24 hours after trying new ingredients. This simple step keeps your pet safe and happy.
Signs of a possible food intolerance or allergic reaction
Even safe ingredients can cause sensitivities in some dogs. Look out for signs like:
- Persistent itching or skin redness
- Digestive upset, such as vomiting or diarrhea
- Excessive gas or bloating
- Lethargy or unusual behavior
If you see these signs, stop treats right away. Always consult your veterinarian if worried or if symptoms last.
Conclusion
It doesn’t take hours to give your dog healthy food. You can now make homemade dog treats in just 30 minutes. Use simple, easy-to-find ingredients.
Choosing the right ingredients is key to your dog’s health. Make sure everything is safe for dogs. Also, watch how much you give to keep them at a good weight.
Keeping your treats fresh is important. Check your storage often to keep them good for your dog.
Customizing recipes for your dog’s needs is rewarding. Try different flavors to see what they like. This shows your dog you care about their health every day.


