
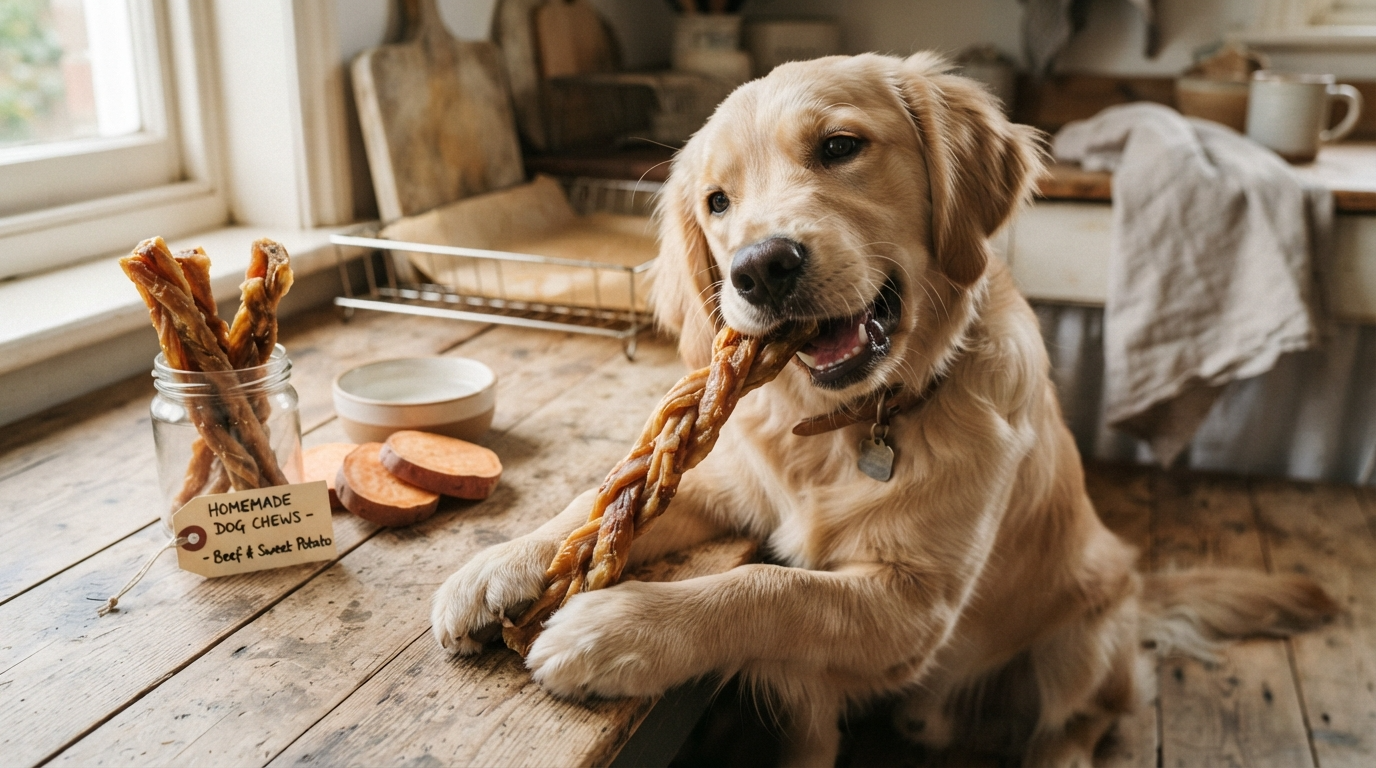
Easy Homemade Dog Chews for a Long-Lasting Treat
Last week, I found my golden retriever, Buster, happily gnawing on my favorite leather slipper. I realized he just needed something satisfying to occupy his time. That moment inspired me to start crafting homemade dog chews for a long-lasting treat that keeps him busy and happy.

You can easily create these snacks using wholesome ingredients like sweet potato, pumpkin, oats, poultry, apples, and carrots. These easy dog treats are perfect for rewarding your furry friend without relying on store-bought fillers. Always ensure the texture and portion size match your pet’s specific needs.
Remember, these snacks are rewards rather than substitutes for balanced meals. In this guide, I will share practical preparation, safety, drying, and storage advice to help you master these homemade dog treats. Let’s get started on making something special that your companion will truly love.
Prepare for Homemade Dog Chews for a Long-Lasting Treat
Before making homemade dog chews, get your kitchen ready and know what your dog needs. Organizing your space makes the process enjoyable and stress-free for you and your pet.
Choose Chew Recipes Based on Your Dog’s Size and Chewing Style
Not every snack fits every dog. Pick diy dog treats that match your dog’s age, jaw strength, and size.
- Small breeds need softer, smaller pieces to avoid choking.
- Large, aggressive chewers need denser textures that last longer.
- Senior dogs do well with chews that are firm but gentle.
- Make sure the treat size is safe for your dog.
Ask Your Veterinarian About Dietary Restrictions
Before giving new healthy dog treats, talk to your vet. This is key if your dog has allergies, sensitive digestion, or health issues.
Your vet can tell you which ingredients are safe and which to avoid. Prioritizing your dog’s health means these snacks are good for them.
Gather a Dehydrator, Oven, Parchment Paper, and Storage Containers
Having the right tools makes making treats easier. You’ll need a few basic items to start:
- A good food dehydrator or oven.
- Parchment paper to prevent sticking.
- Airtight containers to keep treats fresh.
- Sharp knives or mandolines for even slices.
When a Food Dehydrator Is Useful
A food dehydrator is great if you make treats often. It offers consistent airflow and temperature control. This is key for making long-lasting, shelf-stable chews.
How to Use Your Oven Safely
If you don’t have a dehydrator, your oven works well. Set it to the lowest temperature and leave the door a bit open. Always watch your oven to prevent burning and ensure even drying.
Follow Essential Safety Rules Before You Begin
Starting to make homemade dog treats means focusing on safety first. Know which foods are safe for your dog. This caution keeps your DIY treats healthy and fun for your pet.

Avoid Toxic or Dangerous Ingredients
Foods to Leave Out, Including Onions, Garlic, Grapes, Raisins, and Xylitol
Some kitchen items are bad for dogs. Don’t add these to your recipes:
- Onions and garlic (in any form, including powders)
- Grapes and raisins
- Xylitol (a common artificial sweetener found in peanut butter)
Always check labels. Even small amounts can harm your pet.
Why Cooked Bones, Rawhide, and Hard Objects Are Not Homemade Treat Ingredients
Some snacks are too risky. Cooked bones can splinter and hurt your dog’s insides. Rawhide and hard objects can block their intestines or break teeth.
Prevent Choking, Tooth Damage, and Digestive Upset
The right texture is key for your dog’s teeth. Treats that are too hard can break teeth. Treats that are too small can choke them. Make sure the treat fits your dog’s chewing style.
Supervise Every Chewing Session
Never leave your dog alone with a new treat. Supervision stops choking hazards. It also helps you see how your dog reacts to different textures.
Know When to Remove a Homemade Chew
Take the treat away when it’s too small. This stops choking. Being watchful makes sure your natural dog chews are safe and fun for your dog.
Make a Simple Sweet Potato Chew
You can turn a simple sweet potato into a chew your dog will love. These easy dog treats are full of vitamins. They also give a satisfying crunch that keeps your dog busy for a long time.
Ingredients and Equipment for Sweet Potato Chews
You need just a few things to start. Get a sharp knife, a vegetable peeler, a cutting board, and a food dehydrator or your oven with parchment paper.
Step 1: Wash, Cook, and Peel the Sweet Potatoes
First, wash the potatoes well to get rid of dirt. Boil or steam them for five minutes to soften the skin. This makes peeling easier.
After peeling, dry the potatoes with a towel. Proper preparation makes sure your treats are clean and safe for your dog.
Step 2: Slice the Potatoes Into Consistent Strips
For the best results, make the strips the same size. Cut the potatoes into strips that are about a quarter to half inch thick.
Uniform strips dry evenly. This stops some parts from getting too hard while others stay soft.

Step 3: Dry the Strips Until Flexible and Firm
Drying removes moisture, making the strips chewy. You can use a dehydrator or your oven to dry them.
Dehydrator Temperature and Timing
Put the strips on the dehydrator trays in a single layer. Set the temperature to 135°F. Dry them for 8 to 12 hours.
Oven Temperature and Timing
For the oven, use the lowest temperature, about 170°F. Place the strips on parchment-lined baking sheets. Bake for 4 to 6 hours, flipping them halfway.
Step 4: Cool and Test the Finished Texture
After drying, let the strips cool on a wire rack. A good chew should be firm yet flexible when bent.
If they’re too brittle, they’re dried too long. If they’re still soft, dry them for another hour.
Adjust the Texture for Small, Medium, and Large Dogs
Adjust the strip thickness for your dog’s size. Smaller dogs need thinner strips. Larger dogs can handle thicker strips.
Always watch your dog while they enjoy their easy dog treats. This ensures they eat them safely and responsibly.
Prepare a Pumpkin and Oat Chewy Dog Treat Recipe
Want to bake something special? Try this chewy dog treats recipe. It uses pumpkin and oats for a fiber-rich base. This is gentle on your dog’s stomach and offers a satisfying texture.
Ingredients for Pumpkin and Oat Chews
Start by gathering one cup of pureed pumpkin, two cups of rolled oats, and a splash of water if needed. These healthy dog treats use simple, whole-food ingredients. You likely have them in your kitchen pantry.

Step 1: Combine Pumpkin, Oats, and Optional Dog-Safe Additions
Mix pumpkin and oats in a large bowl until a thick dough forms. If it’s too dry, add a little water to bind it well.
Using Plain Pumpkin Instead of Sweetened Pie Filling
Always use 100% pure canned pumpkin or fresh roasted pumpkin. Avoid sweetened pie filling. It can be dangerous for pets because of xylitol or high sugar levels.
Adding Cinnamon, Parsley, or Unsweetened Applesauce Carefully
Enhance flavor by adding a pinch of cinnamon or fresh parsley. Use unsweetened applesauce sparingly to avoid a sticky dough.
Step 2: Shape the Dough Into Thin Strips or Small Bars
Roll the dough out on parchment paper to your desired thickness. Use a knife or pizza cutter to make uniform strips or small bars. These are easy for your dog to hold.
Step 3: Bake the Treats Until Set
Place the strips on a baking sheet and bake at 350°F for 20 to 25 minutes. The edges should be firm, but the center slightly set.
Step 4: Dehydrate the Baked Chews for Longer Use
For a longer-lasting chew, lower the oven to its lowest setting or use a food dehydrator. Drying for an extra hour removes moisture. This makes a durable snack that lasts longer.
Make the Treats Softer for Older Dogs
If your senior dog has sensitive teeth, skip the final dehydration step. These healthy dog treats stay soft and chewy. They are easier for older pets to enjoy safely.
Make a Lean Chicken or Turkey Jerky Chew
Lean chicken or turkey is great for making healthy treats. A simple chewy dog treat recipe lets you choose what your pet eats. This way, you avoid bad additives.
Choose Lean, Unseasoned Poultry for Natural Dog Chews
Choose the leanest cuts of meat. Removing fat keeps the treats fresh longer. This makes your natural dog chews last longer.

Step 1: Chill the Meat Before Slicing
Freeze the meat for 30 to 60 minutes first. This makes it easier to slice. You won’t have to worry about it moving on the cutting board.
Step 2: Cut Thin, Even Strips
Use a sharp knife to cut the meat into thin strips. Try to make them about a quarter inch thick. Consistency is key for safety and texture.
Step 3: Cook the Poultry Thoroughly Before Dehydrating
Cook the meat fully before drying. This step is important to kill harmful bacteria.
Safe Internal Temperature for Chicken and Turkey
Make sure the meat is at least 165°F. A digital meat thermometer is the safest way to check.
Why Marinades, Salt, and Seasoning Should Be Avoided
Keep your ingredients simple. Salt, garlic, onion, and spices can be bad for dogs. Use only pure, unseasoned meat for your pet’s health.
Step 4: Dry the Strips Until Firm but Not Brittle
Dehydrate the strips at a low temperature. They should be chewy, not hard. Properly dried jerky bends slightly without breaking.
Step 5: Cool the Jerky and Inspect Each Piece
Let the treats cool on a wire rack. Check each piece for sharp edges or uneven spots. Your dog’s safety is important during this step.
Use Portion Sizes That Match Your Dog’s Weight
Consider your dog’s size when giving treats. Small dogs need smaller portions than big dogs. Use this chewy dog treats recipe as an occasional treat, not a meal.
Create a Long-Lasting Apple, Carrot, and Oat Chew
Making healthy snacks at home is easy with apples and carrots. These easy dog treats taste sweet, and dogs love them. Adding oats gives a crunchy texture that keeps dogs busy.
Ingredients for a Fruit and Vegetable Chew
Start by getting a few things from your kitchen. You need fresh fruits and veggies, and something to hold them together.
- Two medium apples
- Two large carrots
- One cup of organic oat flour
- A splash of water if needed
Step 1: Prepare Apples and Carrots Correctly
It’s important to prepare the fruits and veggies right. Make sure they are clean and safe for your dog.
Remove Apple Seeds, Stems, and the Core
Always cut apples carefully to avoid the seeds, stems, and core. These can be hard for dogs to digest and might choke them. By removing these parts, you keep your pet safe and happy.
Shred or Puree Carrots for an Even Texture
Shred or puree your carrots for the best texture. This way, they mix well with the oat flour. A smooth texture helps the treats dry evenly.
Step 2: Mix the Produce With Oat Flour
Put your apples and carrots in a big bowl. Add oat flour slowly while stirring until it’s a thick dough. If it’s too dry, a little water helps.
Step 3: Form Thin Shapes That Dry Evenly
Roll the dough on parchment paper until it’s a quarter-inch thick. Use a knife or cookie cutter for thin strips. Thin shapes dry better without burning.
Step 4: Bake and Dehydrate the Chews
Bake the strips at a low temperature until they’re set. Then, use a dehydrator or oven with the door open to dry them out. This makes them firm and long-lasting.
Offer Smaller Pieces to Dogs With Sensitive Stomachs
If your dog has a sensitive stomach, start with small pieces. Introduce new foods slowly to check for any issues. Watching your pet closely during their first tries is best.
Shape and Dry DIY Dog Treats for Better Chewing
Making the perfect snack is more than picking healthy ingredients. The shape matters a lot for your dog’s fun. When making diy dog treats, the shape affects how long your dog chews.
Choose Shapes That Are Easy to Hold and Monitor
The right shape lets you watch your dog while they eat. The size should fit your dog’s breed and be safe.
Strips for Gentle Chewers
Long, thin strips are great for dogs that like soft snacks. They’re easy for your dog to hold and chew on.
Flat Bars for Longer Chewing Sessions
Flat, rectangular bars are durable and keep your dog busy. These natural dog chews are tough and last longer.
Small Bites for Training and Portion Control
Small pieces are perfect for training rewards. They help control your dog’s calories and are tasty.
Leave Space Between Pieces During Drying
Good airflow is key when drying snacks. Make sure to leave space between each piece for even drying.
Rotate Trays and Check for Moisture
Rotate trays for even drying. Always check for hidden moisture in thicker pieces to avoid spoilage.
Tell the Difference Between Firm, Flexible, and Brittle Textures
Knowing the texture is important for safety. Most dogs like firm, flexible treats. But hard treats can be a choking hazard. If treats get too hard, try rehydrating them or use them as quick rewards.
Never Use Homemade Treats as Unsupervised Chew Toys
A dog chew toys recipe is for eating, not for long play. Always watch your dog while they eat to keep them safe.
Cool, Store, and Serve Homemade Dog Treats Safely
Proper handling after baking ensures your dog enjoys every bite without any health risks. When you create homemade dog chews for a long-lasting treat, the final steps are just as important as the preparation phase.
Cool Chews Completely Before Packaging
Never place warm treats into a container. Trapped heat creates condensation, which introduces moisture and encourages rapid spoilage or mold growth. Always let your snacks reach room temperature on a wire rack to ensure they are completely dry.
Store Soft Chews in the Refrigerator
If your recipe results in a softer texture, these items contain more moisture and require extra care. Keep these homemade dog treats in the refrigerator to maintain their quality. Use them within a few days to ensure they remain fresh and safe for your pet.
Freeze Extra Treats for Longer Storage
If you have made a large batch, freezing is your best option. Place the items in a freezer-safe bag or container to prevent freezer burn. You can easily thaw a few pieces at a time when you are ready to reward your dog.
Use Airtight Containers for Fully Dried Chews
For treats that are fully dehydrated, an airtight container is essential. This keeps humidity out and preserves the crunch. Store these in a cool, dark pantry away from direct sunlight.
Check for Mold, Odor, or Texture Changes
Before serving, always inspect the treats. If you notice any of the following, discard them immediately:
- Visible mold or fuzzy spots
- A sour or rancid odor
- Unexpected slime or extreme softening
Serve Treats Within Your Dog’s Daily Calorie Budget
Treats should only make up a small portion of your dog’s daily intake. Always account for these snacks when planning your pet’s overall nutrition.
Reduce Meal Portions When Treats Add Significant Calories
If you provide a larger chew, consider reducing the amount of food in your dog’s next meal. This balance helps prevent unwanted weight gain while still allowing your dog to enjoy their favorite snacks.
Introduce New Ingredients Gradually
When trying a new recipe, start with a small piece to monitor your dog’s reaction. This gradual introduction helps you identify any potential digestive sensitivities before offering a full serving of your homemade dog treats.
Troubleshoot Texture, Shelf Life, and Chewing Problems
Learning to make dog chew toys recipe needs patience and some fixes. Even skilled cooks face small issues with healthy dog treats. But, most problems can be fixed with a few tweaks.
What to Do When Chews Stay Too Soft
Chews that are too soft might have too much moisture. Try putting them back in the dehydrator or oven at low heat for an hour. Make sure the trays aren’t too full for good airflow.
What to Do When Chews Become Too Hard or Brittle
Chews that break easily are often too dry. To make them softer, put them in a container with a fresh apple slice or a damp paper towel for a few hours. This will add moisture and make them safe to chew again.
Prevent Uneven Drying and Spoilage
Uneven drying can happen if pieces are cut differently. Use a mandoline or sharp knife to cut all pieces the same size. Rotate your trays halfway through to dry everything evenly.
Adjust Recipes for Allergies and Food Sensitivities
Changing ingredients is easy if your dog has certain dietary needs. For example, use coconut flour instead of oat flour for grain sensitivities. Always check safe alternatives to keep the recipe balanced.
Replace a Recipe If Your Dog Shows Digestive Symptoms
If your dog has digestive issues after eating a new treat, stop it right away. Every dog’s body is different, and some ingredients might not agree with them. Listen to your dog’s body and try a simpler recipe with fewer ingredients.
Know When a Dental Chew Requires Professional Guidance
Homemade snacks are fun, but they’re not a replacement for vet dental care. If your dog has bad breath, bleeding gums, or trouble chewing, see a vet. These signs often mean there’s a bigger health issue that needs expert medical attention.
Conclusion
Making homemade dog chews is a great way to bond with your pet. It lets you control what they eat. You can use fresh ingredients like sweet potatoes, pumpkin, lean poultry, or apple and carrot blends.
Being consistent is important when making these treats. Make sure to slice them evenly and dry them properly. This way, they’ll be just right for your dog. Always watch your dog while they chew to keep them safe.
Store your treats in airtight containers or the freezer to keep them fresh. Remember, these treats are for rewards, not meals. If you’re worried about your dog’s diet or dental health, talk to your vet.
By cooking in your kitchen, you make healthy snacks for your dog. Start making treats today. It’s good to know what your dog is eating.


