
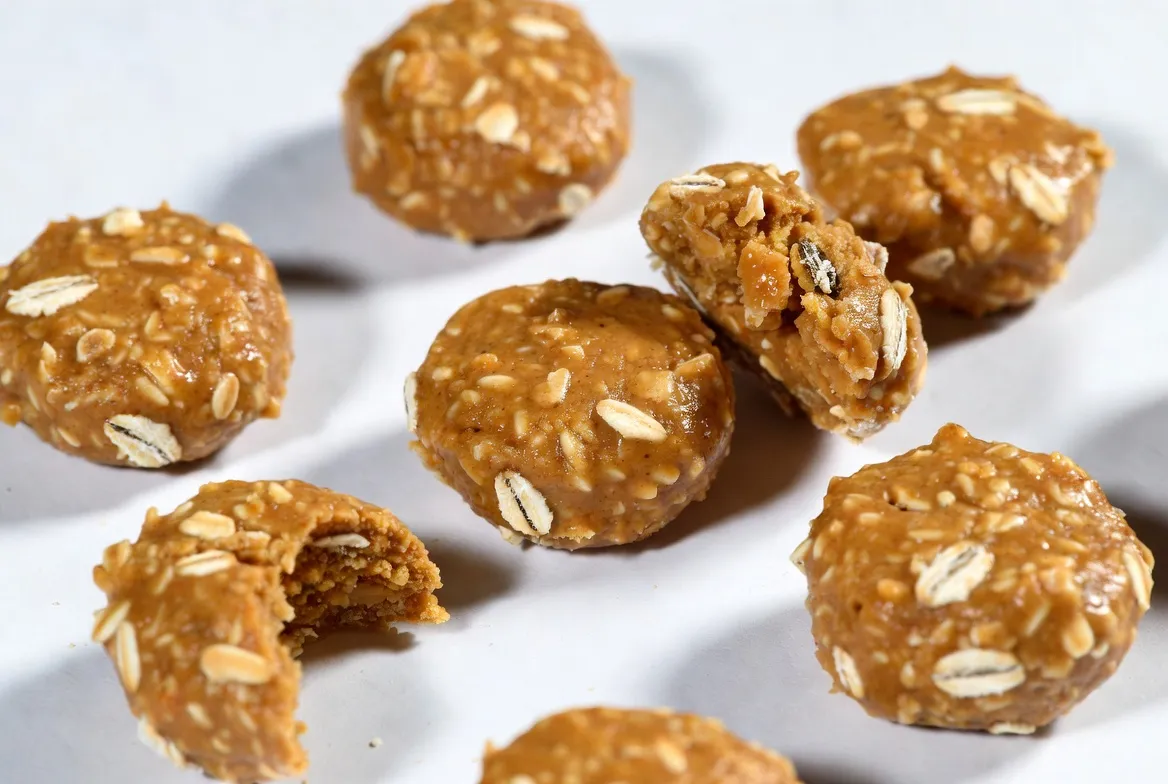
Easy Peanut Butter Bites for Dogs That Your Pet Will Love
Last Sunday, my golden retriever sat by the oven, his tail thumping the floor. He knew something tasty was cooking, and the smell was amazing. It reminded me of the joy of making homemade snacks for my furry friend.

Making Easy Peanut Butter Bites for Dogs is a great way to show love. These treats are easy to make and let you choose what goes into them. By picking high-quality, wholesome ingredients, you help keep your pet healthy and happy.
Using fresh ingredients really makes a difference. Your dog will feel the love you put into these snacks. They’ll become a favorite in your home. Let’s see how to make these tasty rewards from simple pantry items.
Why Homemade Treats Are Better
Making snacks at home is a simple way to boost your pet’s health. Many store-bought treats have hidden additives your dog doesn’t need. By choosing homemade dog treats, you make sure your pet gets only the best.
The Benefits of Controlling Ingredients
When you bake at home, you control your dog’s diet. You can remove unnecessary preservatives, artificial colors, and cheap fillers found in many snacks. This lets you know exactly what your pet eats.
Taking charge of the ingredient list lets you make recipes fit your dog’s needs. If your pet has allergies, you can use safer ingredients. This way, you avoid the mystery ingredients in many commercial treats.
Cost-Effectiveness of DIY Dog Treats
Many think baking at home is expensive, but it’s often not. Making diy dog treats in big batches saves money. You can buy ingredients like flour and peanut butter in bulk to save even more.
Not only do you save money, but you also don’t need to go to the pet store as often. Using ingredients you already have, you make tasty rewards. This budget-friendly strategy keeps your wallet happy and your dog satisfied.
Bonding Through Baking
Baking is more than just making treats; it’s a way to bond with your pet. Your dog will love the yummy smells in the kitchen. This shared experience strengthens your bond.
Working together in the kitchen makes a routine task fun. Whether you’re making dough or waiting for treats to be ready, you’re making memories. These moments of quality time are rewarding for both you and your dog.
Essential Ingredients for Easy Peanut Butter Bites for Dogs
Choosing the right ingredients is key to making tasty and healthy dog treats at home. You want each bite to be full of goodness for your furry friend. Knowing the basics of your recipe is the first step to success.

Selecting High-Quality Flour Bases
The flour you pick is the base of your Easy Peanut Butter Bites for Dogs. Whole wheat flour or finely ground oat flour adds fiber. This fiber helps your pet’s digestion and gives energy all day.
Stay away from bleached white flours because they’re not as good for your dog. Choose organic or stone-ground flours for better health benefits. High-quality grains make your homemade snacks both tasty and good for you.
The Role of Eggs and Binding Agents
Eggs are the glue that keeps your dough together. Without them, your treats might fall apart before baking. Eggs also add protein and healthy fats for a shiny coat.
If you don’t want to use eggs, try mashed banana or unsweetened applesauce. These natural binders keep the treats soft and chewy. Finding the right mix is important for the perfect healthy dog treats.
Natural Sweeteners and Flavor Enhancers
You don’t need artificial stuff to make your snacks yummy. A little honey or mashed pumpkin can add flavor to your Easy Peanut Butter Bites for Dogs. These are safe and add a sweet taste dogs enjoy.
Remember, a little extra flavor is okay. Focus on simple, safe ingredients that are good for your pet. By choosing wisely, you make treats that you and your dog will love.
Safety First: Choosing the Right Peanut Butter
Safety is key in every recipe, even when making peanut butter dog treats. The quality of your ingredients affects your pet’s health. Always check the peanut butter jar carefully to avoid health problems.
The Dangers of Xylitol in Peanut Butter
It’s very important to avoid xylitol in peanut butter. This sugar substitute is extremely toxic to dogs. It can cause a big drop in blood sugar and liver failure.
Before buying peanut butter, always check the ingredients. If you see xylitol or “birch sugar,” don’t buy it. Your dog’s safety is more important than any peanut butter dog treats brand.
Reading Labels for Added Sugars and Salts
Also, watch out for added sugars and salts. Humans might like them, but they’re bad for pets. Too much salt can cause dehydration or serious problems in small dogs.
Choose peanut butter with just peanuts or a bit of oil. Simple is always better for your pet’s diet. Stay away from artificial sweeteners like aspartame or sucralose to keep your dog healthy.
Organic Versus Conventional Options
When picking between organic and conventional peanut butter, think about where the peanuts come from. Organic is better because it’s grown without harmful chemicals. This means less chance of your pet getting sick from chemicals.
But, the most important thing is the ingredient list. Whether it’s organic or not, make sure it doesn’t have bad additives. By being a diligent shopper, you make sure your peanut butter dog treats are safe and healthy for your pet.
Preparing Your Kitchen and Equipment
Getting your workspace ready is vital for making great diy dog treats. A clean and organized kitchen helps you bake safely and efficiently. By preparing everything ahead of time, you can enjoy baking for your dog more.
Essential Baking Tools You Need
To make pet treats that look like they came from a bakery, you need some basic tools. A strong rolling pin helps make dough even. Fun cookie cutters add a cute touch to your treats.
You’ll also need big mixing bowls, a silicone spatula, and a good whisk. These tools help mix your ingredients well.
Sanitizing Your Workspace for Pet Safety
Cleaning your kitchen well is essential to keep it safe for pets. Before you start, clean your countertops with a pet-safe cleaner or vinegar. This keeps your treats free from harmful bacteria and human food.
Preparing Cookie Cutters and Baking Sheets
After cleaning, get your baking sheets ready. Line them with parchment paper or a silicone mat to prevent sticking. This makes cleaning up easier.
Lastly, dust your cookie cutters with flour. This helps them release the dough cleanly. You’ll get perfectly shaped diy dog treats every time.
Step-by-Step Guide to Baking Peanut Butter Bites
You’re just a few steps away from making healthy bites for your dog. This simple dog treat recipe makes sure your snacks are top-notch and free from bad stuff. Let’s start making these special treats.

Mixing Your Dough to the Right Consistency
Start by mixing your wet and dry ingredients in a big bowl. You want the dough to be soft and not sticky. If it’s too dry, add a little water. If it’s too wet, add some flour.
Rolling and Cutting Your Shapes
When your dough is ready, flour your counter to stop it from sticking. Roll it out to about a quarter-inch thick. Then, use your favorite cookie cutters to make fun shapes for your peanut butter dog treats.
- Dust your rolling pin with flour to keep the dough smooth.
- Press firmly with the cutter to ensure clean edges.
- Gather the scraps and re-roll them to minimize waste.
- Place the cut shapes on a parchment-lined baking sheet.
Temperature and Timing for Perfect Texture
Heat your oven to 350°F (175°C) for the best results. The right heat makes a perfectly baked snack your dog will love. Watch the oven closely in the last few minutes to avoid over-browning.
Adjusting for Soft Versus Crunchy Treats
You can change the texture to what your dog likes best. For a simple dog treat recipe with different textures, try these tips:
- Soft and Chewy: Bake for 12 to 15 minutes until the edges are just set.
- Crunchy Biscuits: Bake for 20 to 25 minutes until golden brown and firm.
- Extra Crisp: Turn off the oven and let the treats sit inside as it cools.
Creative Variations and Add-ins
Adding a few extra ingredients can make simple snacks into nutritional powerhouses. Once you know the basic recipe, you can try different healthy add-ins. These changes make your pet’s treats more exciting and add extra vitamins.

Adding Healthy Fruits Like Blueberries or Apples
Fruits add natural sweetness without artificial additives. You can mix them into your dough for tasty dog-friendly snacks your dog will love.
- Blueberries: These tiny berries are full of antioxidants that help your dog’s immune system.
- Apples: Always remove the seeds and core first, as they can be harmful to pets.
- Preparation: Chop or puree the fruit finely so it mixes well into the dough.
Incorporating Vegetables for Extra Nutrition
Vegetables add fiber and minerals for a balanced diet. Many dogs love the taste of fresh veggies, making them great for your recipes.
Try grating carrots or chopping steamed spinach for a nutritional boost. These healthy dog treats become more colorful and packed with nutrients.
Using Oats and Seeds for Texture
For a different crunch, check your pantry. Grains and seeds make dog-friendly snacks that are fun to chew and easy to digest.
- Rolled Oats: They add a hearty texture and are gentle on sensitive stomachs.
- Chia Seeds: A small sprinkle gives a healthy dose of omega-3 fatty acids.
- Flax Seeds: Ground flax seeds help bind the dough and add a nutty flavor.
Proper Storage and Shelf Life
Storing your pet’s snacks right is key. You worked hard to make homemade dog treats. You want them to stay fresh.
Cooling Treats Before Storing
Let your snacks cool on a wire rack first. This step is essential. It stops steam from making them soggy.
Sealing warm treats can make them soft or moldy. Wait until they’re room temperature for the best crunch.
Refrigeration Versus Pantry Storage
For quick use, a cool, dry pantry is great. Use an airtight container to keep out moisture and pests.
If your kitchen is warm or your treats have fresh ingredients, the fridge is better. It keeps them fresh for days.
Freezing Batches for Long-Term Use
The freezer is perfect for big batches. Store them in freezer-safe bags or containers for up to three months.
Freezing lets you have treats ready when you need them. No need to bake every week.
Serving Suggestions and Portion Control
While your pup might beg for more, managing how many dog-friendly snacks they eat is vital for their health. Even the healthiest homemade items should be given in moderation to maintain a balanced diet. Your dog’s long-term wellness depends on these small, mindful choices.
Determining Daily Caloric Intake
Veterinarians say treats should not be more than 10% of your dog’s total daily caloric intake. You need to figure out your pet’s specific needs based on their age, weight, and activity level. Always adjust their main meal portions if you have been generous with snacks throughout the day.
Using Treats for Training Rewards
These homemade pet treats are great for training. Break the bites into smaller, bite-sized pieces before you start. Using smaller portions lets you reward your dog often without overfeeding or upsetting their stomach.
Monitoring Your Dog for Potential Allergies
When you introduce new ingredients, watch your pet closely for any signs of sensitivity. Look for symptoms like itching, redness, or digestive changes after they enjoy their new pet treats. If you notice any unusual reactions, stop serving the dog-friendly snacks immediately and consult your veterinarian to ensure your furry friend stays safe and happy.
Conclusion
Your journey to better pet health begins in your kitchen. Baking peanut butter bites for your dog is a great way to show love. It also ensures they get healthy, quality snacks.
Learning to make dog treats lets you control every ingredient. You’ll know exactly what your pet eats. This makes snack time a special way to show love.
Choosing homemade snacks means avoiding bad stuff in store treats. You can make them just right for your dog. They’ll love the taste and quality.
We hope this guide makes you want to try more homemade pet food. A happy, healthy dog comes from the choices you make. So, put on your apron and make treats that make your dog’s tail wag forever.


