
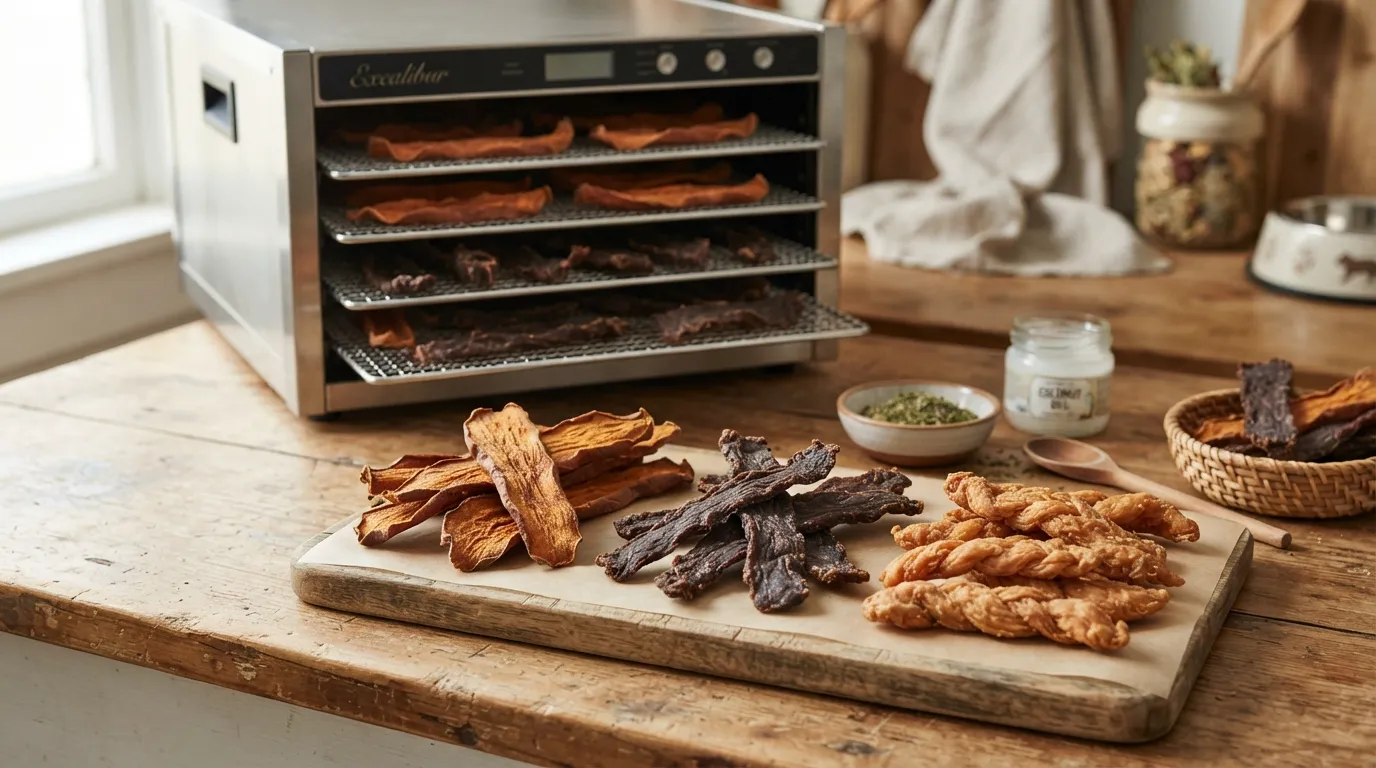
Easy Dehydrator Dog Treat Recipes for Long-Lasting Chews
Last Tuesday, my golden retriever, Buster, ate his snack in seconds. I knew he needed something more to keep him busy while I worked. That’s when I started making diy dog treats in my kitchen.

Making your own snacks is a great way to give your pet healthy food. This guide will show you how to make dehydrator dog treat recipes for long-lasting chews. We’ll cover how to prepare, the best machine settings, and how to store them to keep them fresh.
You’ll learn to make snacks with chicken, beef heart, sweet potatoes, and apples. Remember, these treats should be a part of a balanced diet, not all of it. Always watch your pet when they eat these snacks to keep them safe. Let’s make the best treats for your loyal friend.
Why Make Your Own Dehydrator Dog Treats?
Making your own dehydrator dog treats at home has many benefits. You get to control what goes into your pet’s food. No more worries about hidden fillers or artificial preservatives.
Benefits of Homemade Dog Chews
When you make homemade dog chews, you can tailor them to your dog’s needs. You can change the thickness to fit your dog’s chewing style. This way, your dog gets a great experience every time.
Transparency is the greatest advantage of making your own treats. You know exactly what’s in them.
- Total control over ingredient quality and sourcing.
- Ability to customize portion sizes for weight management.
- Significant cost savings compared to premium store-bought brands.
- Freedom to avoid allergens like grains or specific proteins.
How Dehydrated Treats Differ From Soft Treats
Dehydrated snacks are different from soft treats. Soft treats have a lot of moisture, while dehydrated treats have less. This makes dehydrated treats firmer and longer-lasting.
These treats are harder to chew, which keeps your dog busy. They also help with dental health by reducing plaque. Unlike soft treats, they make your dog work for their snack.
What “Long-Lasting” Means for Different Dogs
The term “long-lasting” means different things for different dogs. A treat that lasts a long time for a small dog might not last long for a big one. Several things affect how long a treat lasts:
- The physical size and density of the treat.
- Your dog’s natural jaw strength and bite force.
- The individual chewing style and persistence of your pet.
- The specific protein source used in the recipe.
By changing the size and thickness of your dehydrator dog treats, you can make them just right for your dog. Observation is key to finding the perfect chew.
Safety Rules Before You Dehydrate Treats
Starting your journey to homemade pet snacks means being careful with ingredients. Before trying out healthy dog treat recipes, know what’s safe and what’s not. This is key to keeping your pet healthy.
Dog-Safe Ingredients to Choose
Lean meats, vegetables, and limited fruit options
Choose high-quality proteins like chicken, turkey, or lean beef. These are good for your dog and low in fat. Add dog-friendly vegetables like carrots, green beans, or sweet potatoes for fiber and vitamins.
For fruits, pick small amounts of apples or blueberries. Make sure to remove seeds and cores to avoid health risks.
Ingredients to Avoid
Onions, garlic, grapes, raisins, xylitol, macadamia nuts, and cooked bones
Some kitchen items are toxic to dogs and should never be used. Onions and garlic can harm red blood cells. Grapes and raisins can cause sudden kidney failure. Xylitol, found in peanut butter, is very dangerous for pets.
Stay away from macadamia nuts, as they can cause weakness and tremors. Also, never use cooked bones because they can splinter and cause harm.
Managing Fat, Choking, and Food Allergies
When making natural dog treats, remove visible fat from meat. Too much fat can spoil quickly and upset your dog’s stomach. If your dog has food allergies, use single-protein sources to avoid reactions.
Think about the size of your treats to avoid choking. Make sure they fit your dog’s size and chewing style.
When to Ask Your Veterinarian for Guidance
If your dog has health issues like diabetes or allergies, talk to your vet first. They can help choose the right ingredients for your dog’s specialized dietary needs. Always put your pet’s health first, even if it means not giving them a quick snack.
Equipment and Ingredients You Will Need
Starting to make homemade pet snacks is easy. You just need a few tools and quality ingredients. The right tools make making dehydrator recipes for dogs fun and easy.
Choosing a Food Dehydrator
Your dehydrator is key in your kitchen. Look for one with adjustable temperature settings. This is important because different foods need different heat levels.
Good airflow is also crucial for even drying. Choose a model with removable trays. This makes cleaning up a breeze.
Essential Preparation Tools
To make natural dog treats like a pro, you need the right tools. The right tools help you prepare ingredients safely and evenly.
Here are some tools you should have:
- A sharp chef’s knife for precise slicing.
- A sturdy, non-slip cutting board.
- Measuring tools to track portion sizes.
- Parchment paper or silicone tray liners to prevent sticking.
- Airtight storage containers for long-term freshness.
Best Ingredients for Firm, Chewy Treats
Choosing the right ingredients is key. You want things that stay firm and are fun for your dog to chew.
Chicken breast, lean beef, beef heart, sweet potatoes, and apples
These ingredients are great for firm, chewy snacks. Chicken breast and lean beef are full of protein. Beef heart is dense and packed with nutrients.
Sweet potatoes and apples add natural sweetness and fiber. Mixing these healthy foods makes dehydrator recipes for dogs tasty and good for them.
How to Prepare Ingredients for Even Drying
Improving your easy dog treat recipes starts with how you cut and trim your ingredients. Getting this right ensures all pieces dry evenly. This makes your treats consistent and safe for your dog.

Trim Fat and Remove Unsafe Parts
Fat doesn’t dry well and can spoil quickly. Always trim away visible fat from meat before drying. Also, remove gristle or sharp bones to keep your pet safe.
Slice Meat and Vegetables to a Consistent Thickness
For easy dog treat recipes to work, slices must be the same thickness. If they’re not, thin ones will dry too fast, while thick ones stay wet. Try to make slices about 1/4 inch thick for even drying.
Pre-Cooking Meat for Food Safety
For some meats, a quick pre-cook can help kill bacteria. Steaming or boiling meat briefly before dehydrating is a good idea. This extra layer of safety is great for dogs with sensitive stomachs.
Preventing Browning and Sticking
To keep your treats looking fresh, dip them in lemon juice and water. This stops browning. If treats stick to trays, use non-stick spray or parchment paper. These tips help your easy dog treat recipes look and taste better.
Dehydrator Settings, Drying Times, and Doneness Tests
Getting the right texture for your pet’s snacks is key. You need to watch the temperature and time closely. Knowing the science behind it helps make dehydrator dog treats consistently good.
Recommended Temperatures for Meat and Produce
For meat snacks, use a temperature of 145°F to 160°F. This kills bad bacteria and keeps the treats chewy.
For fruits and veggies, use 125°F to 135°F. This keeps nutrients in and prevents burning. Following these temperatures is crucial for dehydrator recipes for dogs.
How to Rotate Trays and Check Progress
Every machine dries slightly differently. Rotate trays every two to three hours to dry evenly.
Check your snacks often because drying times change. Look for even drying, not just the timer. Consistent airflow is important to avoid over-drying or under-drying.
Testing Treats for a Safe Chewy Texture
Don’t just look at the surface to check if treats are done. Some might be dry outside but still moist inside.
Take a piece out and let it cool completely on the counter. Then, bend it. It should be firm but not hard. If it’s still damp, put it back in the dehydrator for another hour. This ensures your dehydrator dog treats are safe and tasty.
Dehydrator Dog Treat Recipes for Long-Lasting Chews
You can make dehydrator dog treat recipes for long-lasting chews at home. Use good ingredients and control the drying to make safe and tasty treats. These recipes use natural proteins and veggies for a healthy snack.

Chicken Breast Jerky Strips
Ingredients and preparation
Begin with fresh, boneless, skinless chicken breasts. Remove all fat to prevent spoilage and extend shelf life.
Dehydrating instructions and expected texture
Cut the chicken into thin strips, about 1/4 inch thick. Dehydrate at 160°F (71°C) for 6 to 8 hours. The meat should be firm and dry.
Ways to make the strips last longer for determined chewers
To make long-lasting dog chews, cut the meat against the grain. Thicker strips also make them last longer.
Lean Beef and Beef Heart Chews
Ingredients and preparation
Use lean beef like top round or sirloin. Beef heart is also great, being lean and dense.
Dehydrating instructions and thickness adjustments
Cut the beef into 1/2 inch strips for longer chew time. Dehydrate at 160°F (71°C) for 8 to 10 hours.
How to use beef heart as a protein-rich option
Beef heart is a lean, affordable protein. It makes long-lasting dog chews without extra calories.
Sweet Potato Chews
Ingredients and preparation
Scrub large sweet potatoes well. You can keep the skin on for fiber or peel for a smoother texture.
Dehydrating instructions for flexible or crunchy slices
Slice the potatoes into 1/4 inch rounds or planks. Dehydrate at 135°F (57°C) for 8 to 12 hours. Shorter times make them chewy; longer times make them crunchy.
How to choose the right slice size for your dog
Choose slice sizes based on your dog’s mouth. Small dogs like bite-sized, while big dogs prefer long planks.
Apple and Chicken Combination Chews
Ingredients and preparation
Mix lean chicken breast with sliced apples for a tasty treat. Use firm apples like Granny Smith or Honeycrisp.
Removing apple seeds and core safely
It’s very important to remove apple seeds and core. They are harmful to dogs. Slice the apple carefully after cleaning.
Dehydrating the combination for a firm finish
Layer chicken and apple slices on dehydrator trays. Dry at 155°F (68°C) until firm and leathery. This prevents apple moisture spoilage.
Recipe Variations for Different Dogs
Every dog is unique, from little puppies to older friends. By changing your healthy dog treat recipes, you can meet their needs. This way, your pet will love their treats and stay healthy.
Low-Fat Treats for Dogs With Sensitive Stomachs
For dogs with digestion issues, use lean proteins like white fish or chicken breast. Stay away from oils and fatty parts. These gentle options are better for their sensitive stomachs during training.
Single-Protein Treats for Dogs With Food Allergies
If your dog has food allergies, use only one protein. This helps find out what they can’t eat. These easy dog treat recipes are safe because you know what’s in them.
Smaller Chews for Puppies and Small Breeds
Puppies and small dogs need small, safe pieces to avoid choking. Cut your ingredients into thin strips before drying. Smaller portions also help control calories for less active pets.
Thicker Chews for Large Breeds and Strong Chewers
Big dogs need tough chews to chew on. Cut meat into wide strips for longer-lasting chews. These durable treats are fun for strong jaws and keep them busy.
Adjustments for Senior Dogs With Dental Concerns
Older dogs may have sensitive teeth. Dry their treats for less time to keep them soft. This thoughtful adjustment lets your senior dog enjoy treats without pain.
How to Dehydrate Treats in Step-by-Step Batches
Creating a routine is key to making great snacks for your dog. Turn your kitchen into a workspace. This way, you can make diy dog treats easily and quickly.

Step 1: Wash, Trim, and Measure Every Ingredient
Begin by washing all produce and trimming fat from proteins. Consistency is key for the best results. Measuring slices ensures they dry evenly, which is crucial for dehydrator recipes for dogs.
Step 2: Arrange Pieces Without Overlapping
Put your items on dehydrator trays in a single layer. Make sure to avoid overlapping to ensure airflow. If pieces touch, moisture gets trapped, leading to uneven drying.
Step 3: Set the Dehydrator and Start a Timer
Check your recipe to set the right temperature. Always start a timer to keep track of drying time. A timer helps control the texture of your diy dog treats.
Step 4: Check Texture and Remove Finished Pieces
Check the snacks’ texture as drying time ends. Pieces dry at different rates. Remove finished pieces quickly to avoid them becoming too hard.
Step 5: Cool, Condition, and Label the Batch
Let treats cool on trays before storing. Conditioning them in a jar for a day helps even out moisture. Label your batch with ingredients, date, and storage to keep things organized for next time.
How to Store Homemade Dog Treats for Weeks
Keeping your long-lasting dog chews safe is key. A good storage plan means your dog gets a quality snack every time.
Cooling Treats Completely Before Storage
Make sure treats are completely cool before storing. Warm treats can cause moisture in bags or jars. This moisture can spoil your snacks fast.
Choosing Airtight Containers and Freezer Bags
Choosing the right container is crucial. Look for materials that seal tightly to keep air and moisture out.
- Glass mason jars with rubber seals.
- BPA-free plastic containers with locking lids.
- Heavy-duty freezer bags with double-zipper closures.
- Vacuum-sealed pouches for maximum freshness.
Refrigerator and Freezer Storage Timelines
Dehydrated snacks can last longer with proper storage. They can stay fresh for two weeks in a cool, dark place. For longer storage, follow these guidelines:
- Refrigerator: Keeps treats fresh for up to one month.
- Freezer: Extends the life of your treats for up to six months.
Recognizing Mold, Moisture, and Spoilage
Always check your treats before giving them to your dog. If you see any spoilage, throw them away all at once. Look out for these signs:
- Visible fuzzy mold or discoloration.
- A damp or slimy texture on the surface.
- An unusual or rancid odor.
- Signs of pests or insect activity.
How Batch Size Affects Shelf Life
Think about your batch size when storing. If you make a lot of long-lasting dog chews, divide them into smaller bags. This keeps the treats fresh and safe longer.
Serving Long-Lasting Chews Safely
Keeping your furry friend safe is very important. Long-lasting dog chews are great for their mind. But, you need to watch them closely to keep them safe.

Supervising Your Dog During Every Chew Session
Always watch your pet when they chew. Active supervision helps you stop them if they choke or seem upset. Never leave them alone with a new chew.
Matching Chew Size to Your Dog’s Mouth
Choosing the right size is key. A chew that’s too small can choke them. One that’s too big might hurt their jaw.
- Match the thickness to your dog’s jaw strength.
- Ensure the width is appropriate for their mouth size.
- Avoid pieces that can be swallowed whole by larger breeds.
Limiting Treat Calories and Adjusting Meals
Homemade dog chews add calories. You need to think about this when planning meals. If they love a chew, eat a bit less at dinner.
Knowing When to Discard a Small or Sharp Piece
Chews can break into small pieces. Watch for these and take them away if they’re too small. Also, remove any sharp edges to protect your dog’s mouth and throat.
Introducing New Homemade Treats Gradually
Start with a small amount of homemade dog chews first. This lets you see how they react. Slowly introducing new long-lasting dog chews keeps them happy and healthy.
Troubleshooting Common Dehydrator Problems
Even the most skilled home chefs face problems when making natural dog treats. If your latest batch doesn’t turn out right, don’t worry. Most issues can be fixed with a few tweaks to your method or settings.
Why Treats Stay Soft or Moist in the Center
If your snacks feel soggy or damp, they might have too much moisture. This can cause them to spoil if not dried properly. To solve this, try these steps:
- Try drying them for an extra hour or two.
- Make sure all slices are the same thickness.
- Don’t overload your dehydrator, as it blocks air.
Why Meat Becomes Brittle Instead of Chewy
At times, natural dog treats can become too hard or break easily. This usually happens if the temperature is too high or the meat dries for too long. To avoid this, keep a close eye on the drying time. If edges start curling or darkening, it’s time to take them out.
How to Handle Uneven Slices and Crowded Trays
Consistency is key when dehydrating food. If slices are different sizes, some will dry faster than others. Use a mandoline or sharp knife to make sure all slices are the same. Also, don’t overcrowd your trays. Good airflow is crucial for even drying, so give each piece space.
What to Do When Treats Stick to the Tray
It’s frustrating when your hard work sticks to the dehydrator racks. This often occurs if the meat is too fatty or if you remove the pieces while they’re still warm. Here are some tips to keep your natural dog treats from sticking:
- Use parchment paper or silicone liners on your trays.
- Lightly coat the trays with a small amount of oil if needed.
- Always let the treats cool completely before trying to remove them.
- Gently peel the pieces off once they’ve cooled to room temperature.
Conclusion
Making your own dog snacks at home means you control what they eat. You can make healthy treats like chicken, beef, and sweet potato. These snacks meet your dog’s special needs.
It’s important to pay close attention when making and drying the treats. Keeping them in a cool, dry place keeps them fresh for weeks. Always watch your dog while they chew to make sure they’re safe.
Try new textures and flavors to keep your dog happy. Start with a little to see what they like best. Making these treats is a fun way to take care of your dog.


