
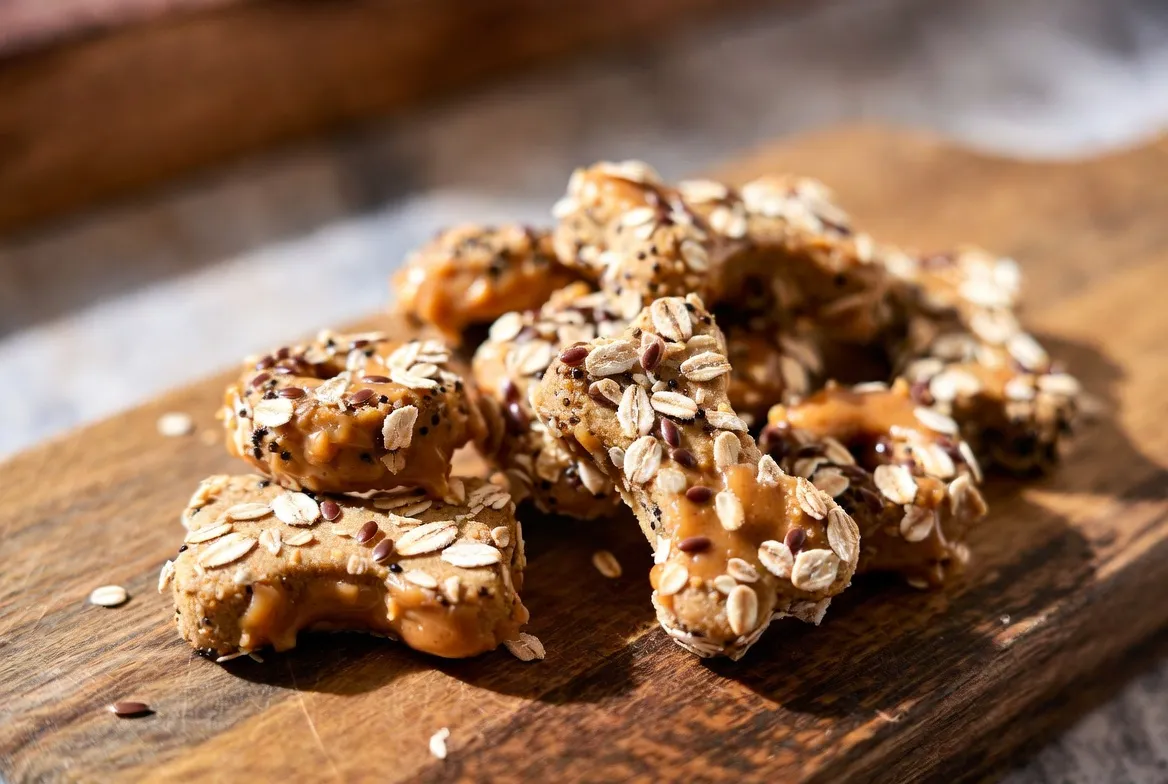
Peanut Butter Oat Flaxseed Dog Treats Easy Recipe
There’s nothing like a wagging tail when you come home. Your furry friend loves you without condition. Baking for your best friend shows you care and gives them the best nutrition.

Making snacks at home keeps out bad fillers. This Peanut Butter Oat Flaxseed Dog Treats Easy Recipe is loved by many. It uses healthy ingredients that help with digestion and coat health.
These treats are easy to make and fill your kitchen with love. Making them yourself is a rewarding experience. It keeps your pup happy, healthy, and eager for more.
Why Homemade Treats Are Better for Your Dog
Switching to homemade treats can make snack time better for your dog. Making homemade dog treats lets you control what goes into them. This means your pet avoids bad stuff in store-bought snacks.
Commercial treats often have preservatives, artificial colors, and cheap fillers. But baking at home means using whole, nutrient-dense foods. Your dog will feel better and look healthier.
Homemade treats are not just safer. They also improve your dog’s health. Owners see their pets have improved digestion and a shinier, healthier coat. Giving your pet fresh food is a great way to show you care and help them stay healthy.
Understanding the Nutritional Benefits of Key Ingredients
When you bake peanut butter oat flaxseed dog treats, you pick ingredients that boost your pet’s health. Each part of this recipe does more than just taste good. It offers real health benefits. By using top-notch, whole foods, you make sure your dog gets the best nutrition in every treat.

The Power of Flaxseed for Canine Health
Flaxseed is a superfood that’s great for your dog. It’s full of essential omega-3 fatty acids. These fats are key for a shiny coat and healthy skin.
They also help with joint health and reduce inflammation. Adding flaxseed to your healthy dog treats boosts your pet’s immune system. It’s also high in fiber, which helps with digestion.
Why Oats Are a Superior Grain Choice
Oats are a gentle grain for dogs with sensitive stomachs. They’re easier to digest than wheat or corn. Oats also give your dog a steady energy boost.
They’re packed with B vitamins and minerals that keep your dog active. Using oats in your treats keeps your dog full without feeling heavy. It’s a fiber-rich grain that helps control blood sugar and adds a great texture that dogs love.
Selecting the Right Peanut Butter for Safety
Not all peanut butter is safe for dogs. Always check the label to make sure it doesn’t have Xylitol. This sweetener is very bad for dogs and can cause serious health problems.
Choose natural peanut butter with just peanuts or a bit of salt. Avoid brands with added sugars, hydrogenated oils, or preservatives. By picking a pure, high-quality peanut butter, you can make healthy dog treats that are safe and tasty for your pet.
Essential Kitchen Tools for Baking Dog Treats
Starting with diy dog treats is easy. You don’t need fancy kitchen tools. Most things you need are probably in your kitchen already.
Having the right tools makes baking efficient and fun. Organize your space with these simple items. This way, you get great results every time. It also keeps your area clean while you work.
Before you start baking, gather these basic items:
- Rolling pin: It helps make your dough even.
- Cookie cutters: They make your diy dog treats look cool.
- Parchment-lined baking sheets: They prevent sticking and make cleaning up easy.
- Mixing bowls: A good set makes mixing ingredients simple.
Having these tools ready makes baking a rewarding routine. It lets you enjoy making healthy snacks for your dog. It’s a fun way to show your pet you care.
Peanut Butter Oat Flaxseed Dog Treats | Easy Recipe
Making these peanut butter oat flaxseed dog treats is easy and fun. You don’t need to be a pro to make your dog happy with tasty snacks. This recipe is simple and makes treats that are just right.

Gathering Your Ingredients
First, make sure you have everything ready. Fresh, quality ingredients make a big difference in taste. These simple dog treats will be a hit.
- 2 cups of rolled oats (or oat flour)
- 1/2 cup of natural, xylitol-free peanut butter
- 1/4 cup of ground flaxseed meal
- 1/3 cup of warm water
- 1 large egg to help bind the dough
Step-by-Step Mixing Instructions
Mixing wet and dry ingredients right is key. Follow these steps for the best dough.
- Preheat your oven to 350°F (175°C) and line a baking sheet with parchment paper.
- In a large mixing bowl, combine the oats and ground flaxseed meal until well blended.
- Add the peanut butter and egg to the dry mixture, stirring until the dough begins to form.
- Slowly pour in the warm water, mixing continuously until you have a smooth, workable dough.
Rolling and Cutting Your Dough
Now, shape your dough into treats. Make sure they’re all the same thickness for even baking.
Dust your countertop with oat flour to prevent sticking. Roll the dough to 1/4 inch thickness. Use cookie cutters for fun shapes. Place them on your baking sheet. Your dog will love these healthy treats.
Baking Tips for the Perfect Crunch
Getting the right texture is key for your dog’s snacks. When making simple dog treats at home, you control the texture. It can be soft and chewy or firm and crunchy.

Adjusting Oven Temperatures for Different Textures
For a softer snack, bake at a lower temperature for a shorter time. This keeps the treats moist, perfect for senior dogs or puppies.
For a crispy biscuit, bake at a higher heat first. Then, lower the oven to finish baking. This slow-baking technique makes the treats crispy and satisfying.
How to Tell When Treats Are Fully Dehydrated
Dehydration is crucial for keeping treats fresh. Treats are ready when they feel completely dry and have no soft spots.
The edges should look golden brown and firm. If the center feels spongy, bake for a few more minutes. Ensuring they are fully dehydrated keeps them safe and tasty for your dog.
Safety First: Ingredients to Avoid in Dog Treats
Keeping your pet safe is key. When making pet treats at home, you control the ingredients. But, some common foods are extremely toxic to dogs.
The Dangers of Xylitol in Peanut Butter
Checking your peanut butter label is crucial. Many brands use xylitol, a sugar-free sweetener. But, it’s deadly to dogs, even in small amounts.
Xylitol lowers your dog’s blood sugar fast. This can cause liver failure or seizures quickly. Always check the ingredients to make sure your peanut butter is safe for pet treats.
Other Common Kitchen Hazards for Pets
Many household items are dangerous for dogs. Keep them away from your baking area. If you’re not sure about an ingredient, it’s best to avoid it.
Here are some items to keep out of your kitchen:
- Chocolate and Cocoa: These are toxic to a dog’s heart and nervous system.
- Grapes and Raisins: They can cause sudden kidney failure in dogs.
- Onions and Garlic: They can damage your dog’s red blood cells and cause anemia.
- Macadamia Nuts: They can make pets weak, shaky, and too hot.
By being careful and informed, you can give your dog delicious and safe treats. Your effort to choose safe ingredients makes every snack time a joy for your pet.
Customizing Your Recipe with Dog-Safe Add-ins
You can make your treats fancy with a few simple steps. Start with a basic dough, then add new ingredients. This keeps your dog excited about their dog-friendly recipes. Choose the right extras to keep each bite healthy and tasty.
Adding Fruits and Vegetables for Extra Flavor
Fresh produce boosts the vitamins in your treats. Dogs love the sweetness of fruits and the taste of cooked veggies. Here are some safe and tasty options:
- Blueberries: Full of antioxidants for a strong immune system.
- Pumpkin: Good for fiber and gentle on the stomach.
- Carrots: Give a nice crunch and beta-carotene.
- Apples: A crisp, refreshing snack (remove seeds first).
Incorporating Herbs for Digestive Health
Some herbs can also be good for your dog. Adding a bit of fresh, chopped herbs can make your treats smell better. It also helps your dog’s health. Use only fresh, organic herbs to avoid harmful pesticides.
- Parsley: Freshens breath and aids digestion.
- Mint: Helps soothe an upset stomach when used carefully.
- Basil: Has anti-inflammatory properties for active dogs.
When you start adding new things to your dog-friendly recipes, do it slowly. This lets you see if your dog has any allergies. Start with small amounts to keep the dough easy to work with.
Proper Storage and Shelf Life for Homemade Snacks
Proper storage is key to keeping your homemade dog treats fresh. Since they don’t have artificial preservatives, you need to be extra careful. A few simple steps will help your dog enjoy every bite.
Keeping Treats Fresh at Room Temperature
For snacks you’ll use in a week, room temperature is okay. Let them cool completely on a wire rack first. This stops moisture buildup and mold.
Put your nutritious dog snacks in an airtight glass jar or BPA-free plastic. Keep them in a cool, dry spot, away from sunlight. If you see moisture, open the lid a bit to air out.
Freezing Methods for Long-Term Storage
Freezing is great for saving treats for later. It keeps them fresh for up to three months. It’s ideal for busy pet owners who want healthy snacks.
To freeze, lay cooled treats on a baking sheet and freeze for an hour. Then, put them in a freezer-safe bag or container. Label the bag with the date. When you want to serve, thaw a few at room temperature for fifteen minutes.
Managing Portion Control and Daily Caloric Intake
Keeping your furry friend at a healthy weight starts with smart portion control for snacks. Even the most nutritious healthy dog treats should only make up a small portion of your dog’s total daily caloric intake. By monitoring what your pet eats, you ensure they stay active and happy for years to come.
Calculating Treats as Part of a Balanced Diet
A good rule of thumb is the 10% guideline. It says treats should not exceed 10% of your dog’s total daily calories. To calculate this, you must first know your dog’s ideal caloric needs based on their age, weight, and activity level. Always consult your veterinarian if you are unsure about the specific calorie count your pet requires.
When you prepare pet treats at home, you know exactly what goes into them. You can easily adjust the size of the portions to fit your dog’s needs. Consider these factors when determining the right amount:
- Your dog’s current weight and body condition score.
- The intensity of their daily exercise routine.
- The caloric density of the ingredients used in the recipe.
- Whether your dog is a senior with a slower metabolism.
Signs Your Dog Might Be Over-Snacking
It is easy to overindulge our pets, but being aware of the physical signs of over-snacking is essential. If you notice your dog gaining weight or losing their waistline, it may be time to cut back on extra snacks. Excessive calorie consumption can lead to health issues that impact their quality of life.
Watch for these common indicators that your dog is receiving too many pet treats:
- A noticeable increase in body weight or a rounder midsection.
- Decreased energy levels or reluctance to go for walks.
- Becoming a picky eater during regular meal times.
- Digestive upset or frequent changes in stool quality.
By staying mindful of these signs, you can continue to provide healthy dog treats without compromising your pet’s physical well-being. Balance is the secret to a happy, thriving dog.
Troubleshooting Common Baking Issues
Learning to make diy dog treats means knowing how to fix small kitchen problems. Even if your first batch isn’t perfect, you can get better next time. Baking gets better with every try.
Fixing Dough That Is Too Sticky or Dry
If your dough is too sticky, it has too much moisture. You can gently add a little extra oat flour, one tablespoon at a time. This will help until it’s easier to work with.
If your dough is too dry and falls apart, it needs more moisture. Here are some easy ways to fix it:
- Add a teaspoon of water or unsweetened applesauce to the mix.
- Knead the dough well to spread the moisture evenly.
- Let the dough rest for five minutes to let the oats soak up the liquid.
What to Do If Treats Burn Easily
Baking diy dog treats needs careful oven temperature watching. If your treats are browning too fast, your oven might be hotter than you think. Use an oven thermometer to check the real temperature.
To stop treats from burning, try these tips:
- Rotate your baking sheet halfway through baking.
- Use parchment paper to avoid direct contact with hot pans.
- Check the treats five minutes before the recipe says to.
- Take the tray out of the oven when the edges are golden brown.
Conclusion
Making homemade snacks lets you control what your pet eats every day. You can now make healthy treats that keep your dog happy and full of energy.
Trying out different dog-friendly recipes lets you make treats your pet will love. You can play with different tastes and textures. But always remember to keep their health first.
Sharing these treats makes your bond with your dog even stronger. Your kitchen becomes a place of joy. You make healthy food with love for your pet.
Begin baking today and see how much your dog loves these fresh, healthy snacks. Learning these recipes means your pet always gets the best food.


